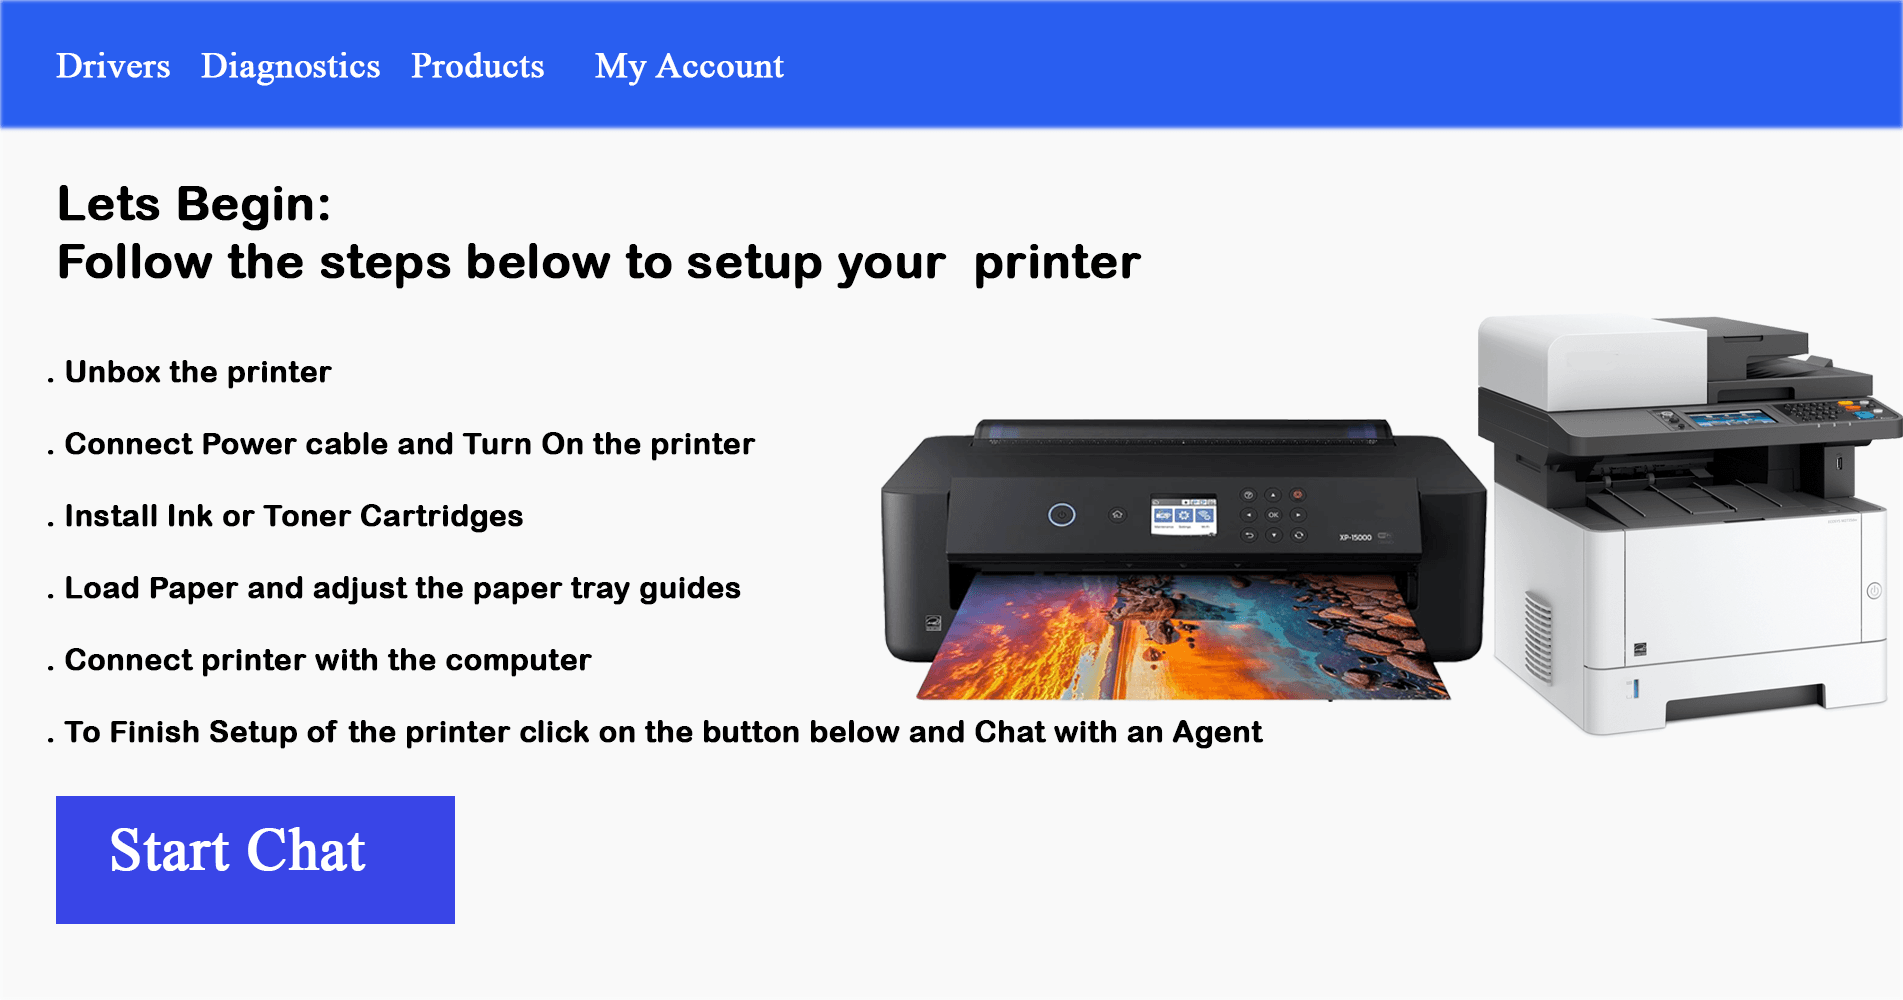
How to setup a printer with your computer
Connect a printer with your windows or a mac computer, once connected the printer can be shared with other devices on your network

Method 1: Setup a Printer Using a USB Cable on a Windows Computer
- Choose a flat, stable surface close to a power outlet and in close proximity with your computer to the printer can be connected with the computer.
- Connect your printer to a power source. Use a USB cable to link your printer to your powered-on and unlocked computer. In certain situations, plugging in your printer can automatically configure and install it, making it ready to use.
- In the bottom left corner of your screen, click on the Windows logo. This will open the Start menu. From there, look towards the lower left again and select Settings.
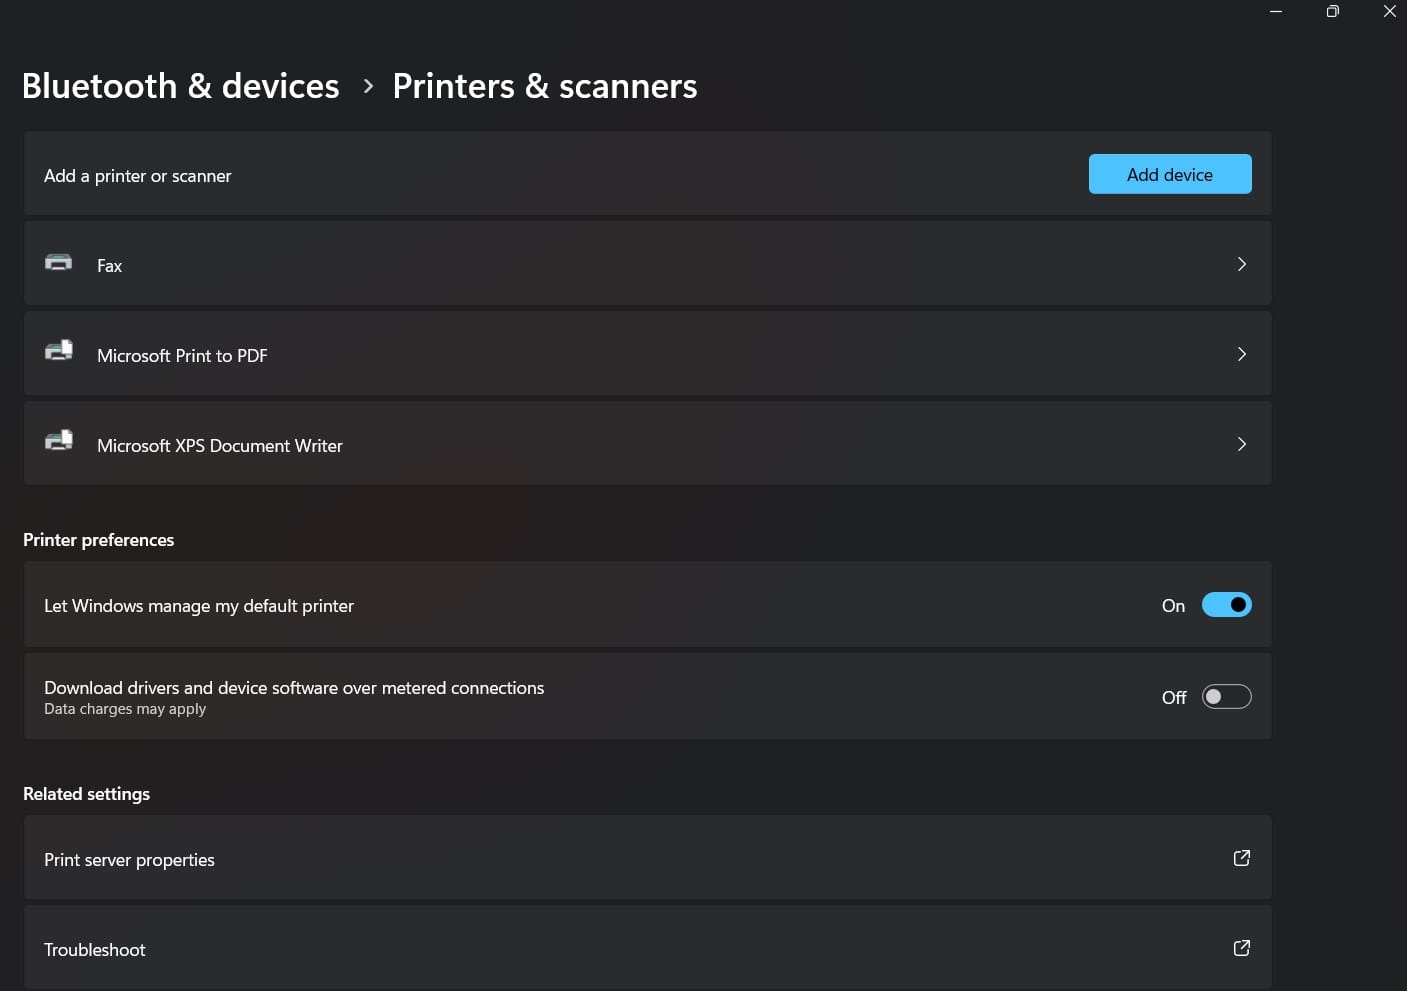
- First, choose the Printers & Scanners option from the menu on the left. Then, click the Add a printer or scanner button located at the top of the window.
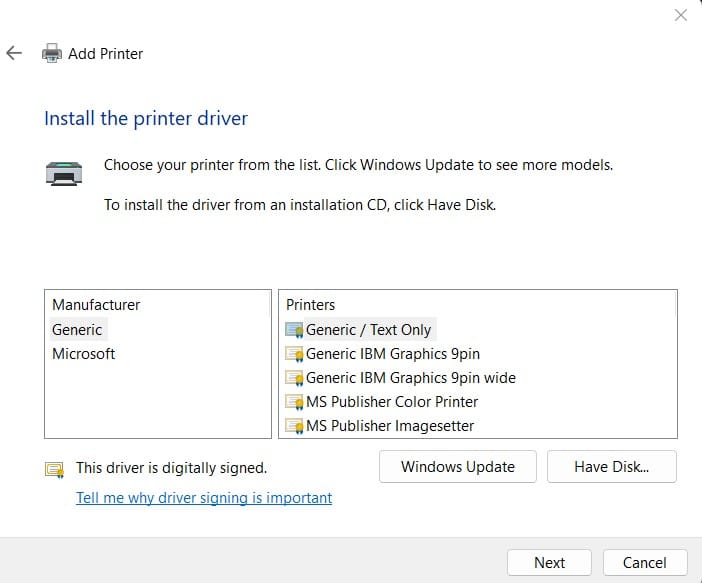
- Look for your printer's name (usually a combination of the manufacturer, model name, and model number) and click the Add device button next to it. If you can't find your printer, select the option The printer that I want isn't listed and follow the steps provided.
- Follow the steps displayed on your screen. You might need to make a few adjustments to your printer settings. Once you've finished, your printer will be ready to use. If you're asked to, insert the CD that came with your printer into your computer's disc drive. If you don't have a CD, you can usually download the necessary software from the manufacturer's website.
Method 2: Setup a Printer Using a USB Cable on a Mac Computer
- Before you plug in your printer, make sure your Mac is running the newest software. This includes the latest printer drivers.
- Choose a flat, stable surface close to a power outlet and in close proximity with your computer to the printer can be connected with the computer.
- Let's turn on your printer! Press the power button (the one with the power symbol) to get it started. Don't forget to plug it into a power outlet.
- Use a USB cable to link your printer to a USB port on your computer's case. Make sure your computer is powered on and you've logged in. If your Mac lacks a standard USB port, you'll need a USB-C to USB converter.
- Select the Install option and follow the instructions on your screen. Your Mac should automatically install the printer. If a pop-up window appears, click Download & Install to complete the process. Once finished, your printer will be ready to use.


Method 3: Setup Printer with a Wireless Network on a Windows Computer
- Before proceeding, verify your printer's network connection type. Bluetooth printers have a distinct setup process. Note that certain Wi-Fi printers may need to be physically connected to your router using an Ethernet cable to receive an internet signal.
- Place your computer and printer in an area with a strong Wi-Fi signal. Ensure your printer is within the Wi-Fi router's range to establish a reliable connection.
- Turn on your printer by pressing the power button. If your printer requires a wired connection, use an Ethernet cable to connect it to your router.
- If you need specific instructions for setting up your network, check your printer's manual. You can find it on the manufacturer's website if you don't have a physical copy.
- Connect the printer with your computer:
- Wi-Fi: Let's connect your printer to your Wi-Fi network. Just follow the steps on your printer's screen and enter your network password. Make sure your computer and printer are on the same Wi-Fi network.
- Bluetooth: To connect via Bluetooth, find the "Pair" button (it usually looks like a curvy "B") on your printer and press it.
- Locate the Windows logo in the lower left corner of your screen and click on it.
- Select the Settings option located in the lower left corner of the Start menu.
- Select the Devices option located near the top of the Settings window.
- Choose Printers & Scanners or Bluetooth & Other Devices from the left side of the window, and click "Add a printer or scanner" or "Add a Bluetooth or other device" at the top. Follow the prompts.
- Test your setup by printing a Test Page.

Method 4: Setup printer using a wireless network on a Mac computer
- Verify your printer's network connection type: Bluetooth printers have a distinct setup process. Certain Wi-Fi printers may need to be physically connected to your router using an Ethernet cable to receive an internet signal.
- Place your computer and printer in an area with a strong Wi-Fi signal. Ensure your printer is within the Wi-Fi router's range to establish a reliable connection.
- Turn on your printer: Press the power button. If your printer requires a wired connection, use an Ethernet cable to connect it to your router.
- Check your printer's manual: For network setup instructions, refer to your printer’s manual or the manufacturer’s website. Some printers might need a USB cable for initial Wi-Fi setup.
- Wi-Fi: Access the Wi-Fi setup menu on your printer’s display and input your network password. Ensure your computer and printer are on the same Wi-Fi network.
- Bluetooth: Locate the "Pair" button (often symbolized by a curved "B") on your printer and press it to initiate pairing.
- Locate the Apple logo: In the upper left corner of your screen, click the Apple logo and select System Preferences/System Settings.
- Printers & Scanners: In System Preferences, select the Printers & Scanners icon. Click the Plus button to add a printer.
- Choose your printer’s name: Once setup is complete, your printer’s name will appear in the list, indicating successful connection. Double-check that it's on the same network.
- Test Printing: Run a test print to ensure the printer is connected and functioning properly.
Method 5: Setup Printer on a Wireless Network
- Set up the printer on the computer you plan to use for sharing. You can use either a wired or wireless connection to connect the printer to your computer.
- Locate the Windows logo in the lower left corner of your screen and click on it.
- Select the Settings option located in the lower left corner of the Start menu.
- Select the Network & Internet option located in the Settings panel.
- Select the Status tab located in the upper left corner of the window.
- Select the Sharing options link located near the top of the page, under the "Change your network settings" heading.
- Choose the Private option from the drop-down menu and click the button to the right of it.
- Select the "Turn on file and printer sharing" option under the "File and printer sharing" heading.
- Other Windows computers on your network can connect to the shared printer. Make sure the computer sharing the printer is powered on.
- If you’re using a Mac computer to connect to this printer:
- Go to System Preferences.
- Select Printers & Scanners.
- Click the + button.
- Choose the Windows tab.
- Select the printer's name from the list.

Disclaimer: Users are advised to read this disclaimer carefully and thoroughly. Indus Mechanix provides detailed information about printers, extenders, Arlo, and Alexa devices to enhance your knowledge and assist you in resolving any issues you may encounter while using these devices. Indus Mechanix is not affiliated with any specific brand, associate program, or affiliate advertising program, and we do not promote any particular product, brand, or software. Additionally, we do not provide access to external links. If you come across any external link on our website, please notify us, and we will promptly remove it. At Indus Mechanix, all brand names and product logos are used solely for representational purposes. We are not responsible for any external content or links.